Create and Deploy an Azure Virtual Machine (VM)
Create a virtual machine on the cloud, learn cloud resource deployment and begin your cloud journey.
Prerequisites
- Skills
- Use the internet
- Items
-
1 Microsoft Account (Outlook, Hotmail, etc.)
- Completed
- Other
-
Free $200 Azure Credit (included when you sign up for Azure)
Start Point
The Azure Portal
Walkthrough
1. Navigate into the Portal
Log in to the portal using your username and password.
2. Create a VM
1. On the top-left, click + to create a resource.
2. A list appears. Look for and click on Virtual Machine.
3. Complete the Basics settings only. Even most of the settings in the Basics page can be skipped except the mandatory ones:
Resource group: Give it any name.
VM Name: Pick a nice name.
Availability Zone (AZ): Change this if you receive a zone-related error. Otherwise, leave it as is.
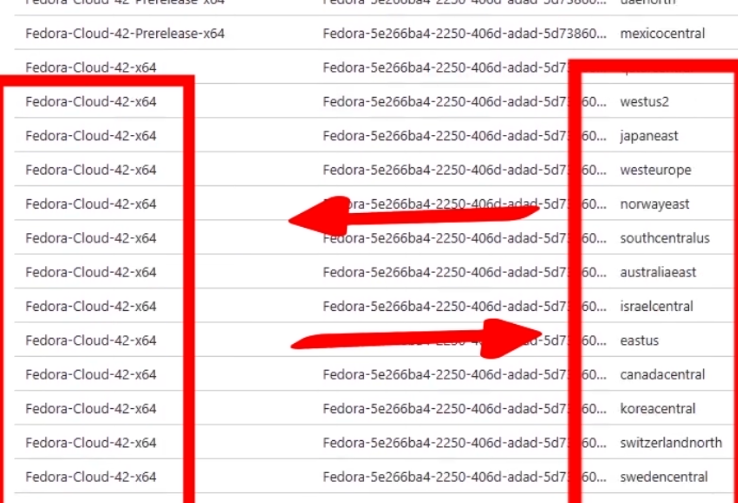
Image: Select "See all images". On the top-left, select "Community Marketplace". Search for "fedora-cloud-42". Scroll to the titles suffixed with "-x64". Select the location closest to your network.
Size: This is a mandatory setting with a default value of B1s, a free-tier VM. Do not change this setting or your Azure credits will be used. If you receive an error, change the AZ instead.
Authentication type: Make sure it's set to SSH public key. (This is the default setting.)
Username: My favorite part. Pick your favorite token for logging into the VM.
Select inbound ports: Select SSH. If you intend to develop this VM into a web server, select HTTP and HTTPS as well.
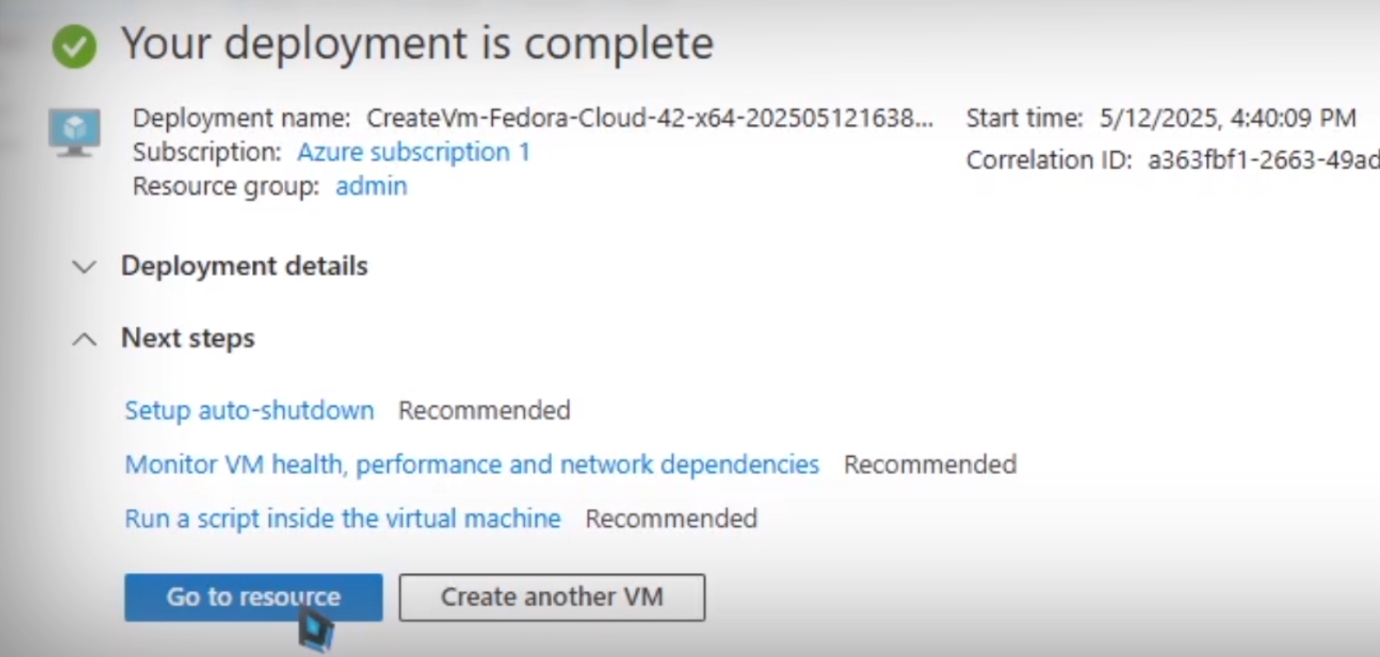
3. Click the Review + create button. Azure will validate the VM's settings. After 1-2 minutes, a summary page appears. Click the Create button. A pop-up appears.

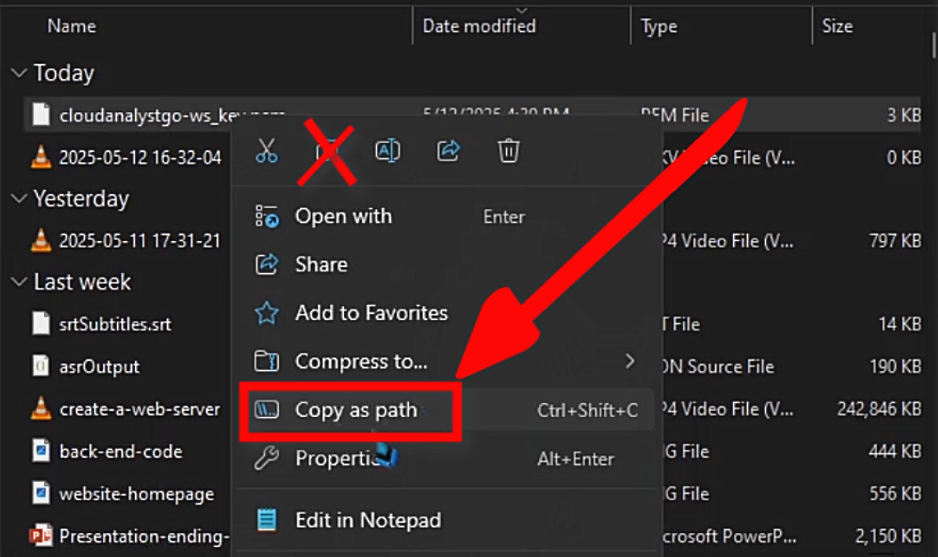
4. As noted in the image, Azure doesn't store the Private Key. This is your authentication token. It is like a password and a physical house/car key, but better: It is virtually impossible to replicate, and you don't have to remember its contents. Download it, store it in a safe folder and right-click it. Copy its path and paste it onto Notepad: You will need this later.
5. Azure is now allocating the hardware resources for your VM in their datacenters. The deployment or provisioning process for the VM takes between two to three minutes, so check back in five minutes for the next step.
3. Log in to your VM
1. Connect via SSH into your VM. You will need:
- Your VM's IP address
- Your key pair

2. Type yes when you are prompted for the authenticity of the server.
Permission Denied error. Look out for these pitfalls when using SSH.
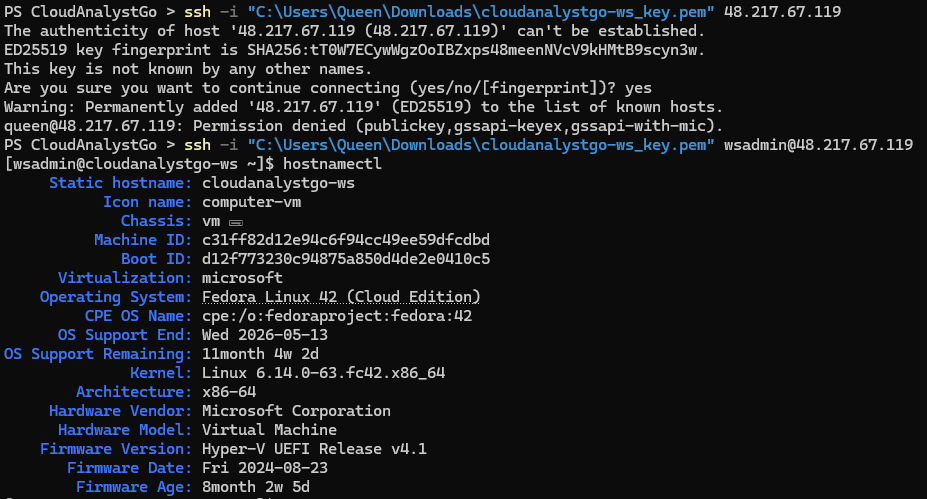
ssh uses the computer's name if a username isn't supplied.
CONGRATULATIONS!
You have successfully created and deployed a VM on the cloud!
You can now host a website, examine system logs or run applications.