Build Your Own Free Cloud Server & Website: Nginx on Linux
Create a web server on the cloud, learn basic routing and serve your website for free
Requirements
- Skills
- File navigation || Connect with SSH
- Items
-
1 Azure Account (free)
1 Azure VM (free)
- Completed
- Other
- Your VM's IP
- Your VM's key pair
Start Point
Your cloud's console

Walkthrough
1. Update the system
Connect via SSH into your VM. You will need:
- Your VM's IP address
- Your key pair
Find Your VM's IP
- On the top-left corner of Home in your Azure Portal, click on the hamburger menu (☰).
- Scan the list for "Virtual Machines."
- Click to navigate to the page, and identify your VM.
- Copy the IP of the VM.
Find your VM's key-pair and copy its path. Open a PowerShell console on Windows (or terminal on Linux). Enter the following command:
ssh -i /paste/the/path/to/your/key-pair.pem your-username@the-ip-you-copiedYou are now logged onto the VM.
2. Perform a status check. Type and enter:
clear; hostnamectl
3. Update the VM. Run the following command:
sudo dnf update -ysudo apt update -y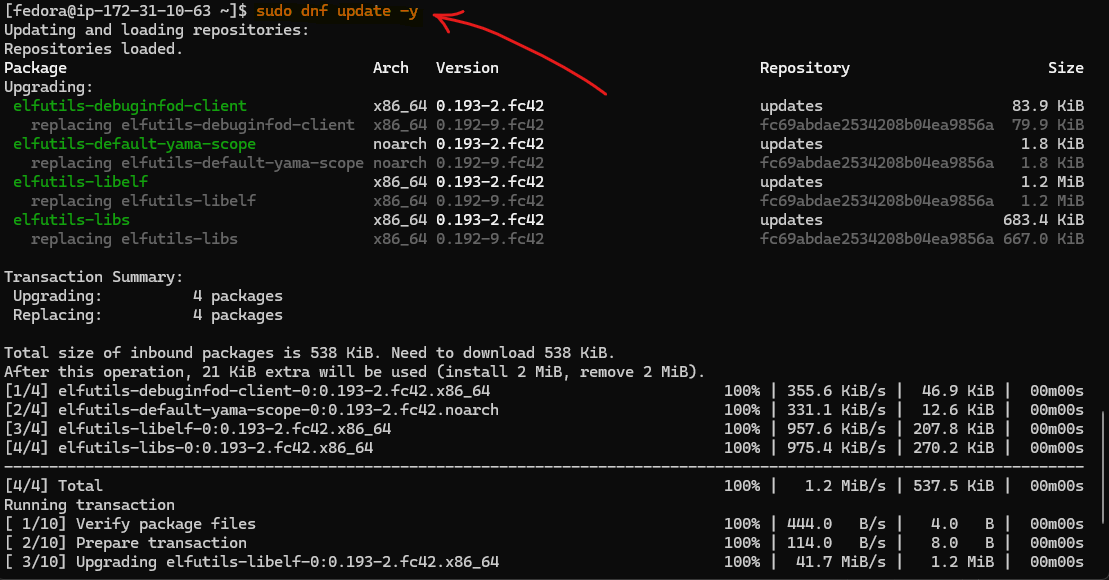
2. Install nginx
1. Now that the system's updated, install nginx (pronounced "engine-x"), a web server that delivers websites to visitors over their browsers. Afterwards, check if nginx is active, and enabled. Run the following commands:
              sudo dnf install nginx -y
              sudo systemctl status nginx
              sudo apt install nginx -y
              sudo systemctl status nginx
2. Examine the output. If you see that nginx is disabled or inactive (common on Fedora), we need to start and enable nginx. (If the system is active and enabled - common on Ubuntu - skip below to 3. Load the website.)
3. Run the following commands:
        sudo systemctl start nginx
        sudo systemctl enable nginx
        sudo systemctl status nginx
Now the output should show Active: Enabled and Enabled (next to preset:disabled; this is okay).
This status indicates that the website is ready to load, and will boot up anytime the server boots up.
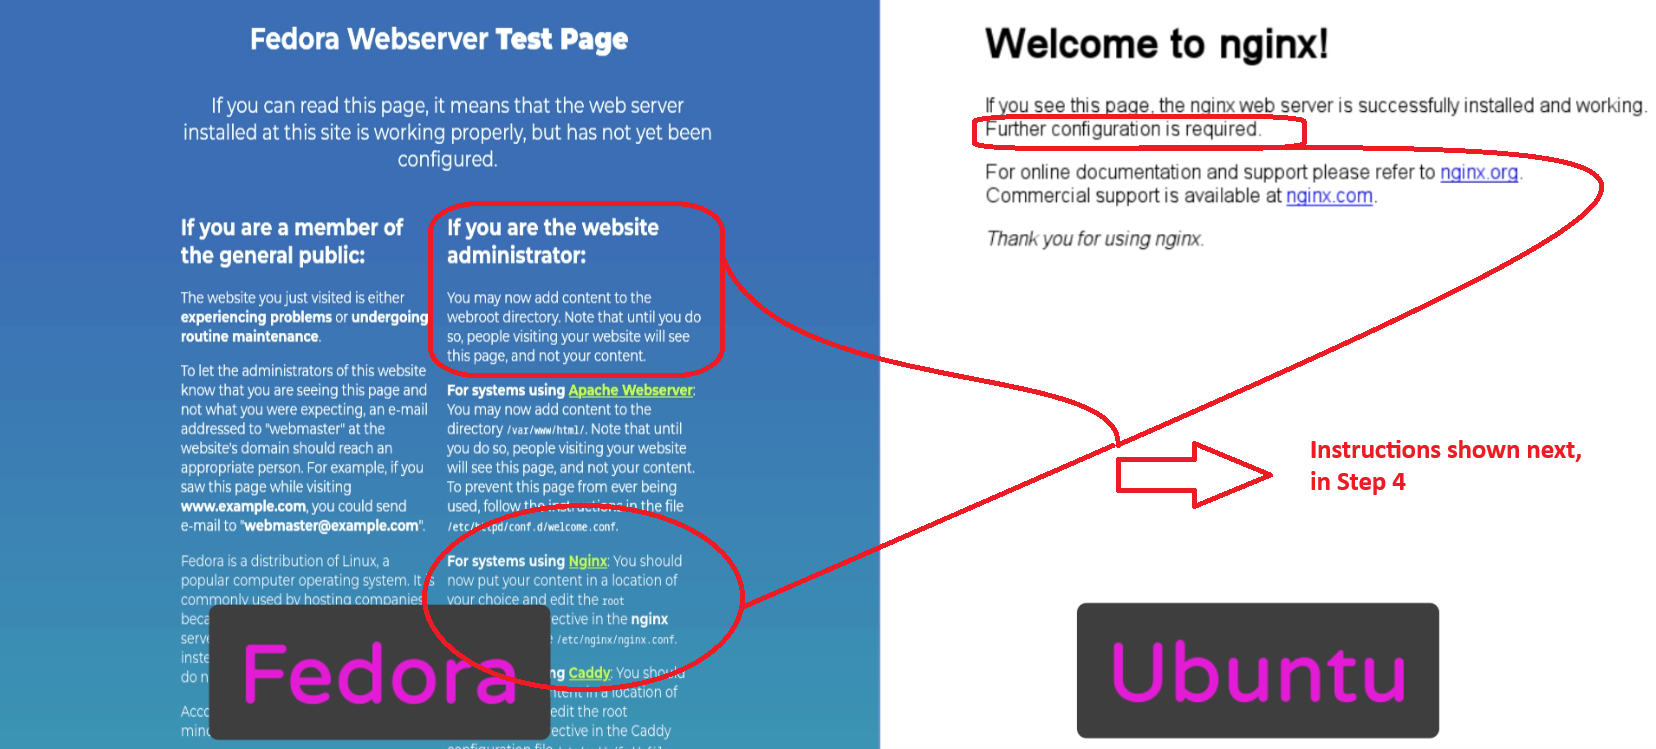
3. Load the website
1. The IP you copied when you were logging into your VM in Step 1 is the location of the website on the internet. Enter that IP into your web browser: You should see the nginx test page appear.
4. Add some content
1. Create a directory where your content will live, along with the homepage for your website. Run the following commands:
      sudo mkdir -p /var/www/myOnlineServerSite/html
      sudo nano /var/www/myOnlineServerSite/html/index.html
where myOnlineServerSite is the name of your site. For the name, you can choose to use the IP, myReallyCoolSite or any arbitrary name.
2. For this step, you will use nano, a text editor. When nano's window pops up, copy and paste the following text followed by CTRL+S and CTRL+X (or cmd+s, then cmd+x if on a Mac):
        <!doctype html>
        <html>
          <head>
            <title>"My blank slate"</title>
          </head>
          <body>
            <p>"Hello from Linux!"</p>
          </body>
        </html>
This will save (Ctrl/cmd+S) and close (Ctrl/cmd+X) your file.
The following contents always comprise an HTML file:
- <!doctype html> element, promoting HTML5 functionality and compatibility
- One set of <html> opening and closing tags, containing a head and body
- One set of <head> opening and closing tags, containing a title
- One set of <title> opening and closing tags
- One set of <body> opening and closing tags
Always adhere to HTML structure. If "Hello, world!" was typed as the file's only contents, the file would not have followed HTML structure and may not parse well.
5. Connect the content to your website
1. We will need to configure a server to grab our content and host it like we saw earlier. Most of the work is already done by the default configuration, but there are some areas that require a second look. Let's enter the default configuration file with sudo nano /etc/nginx/nginx.conf, and examine the server block:
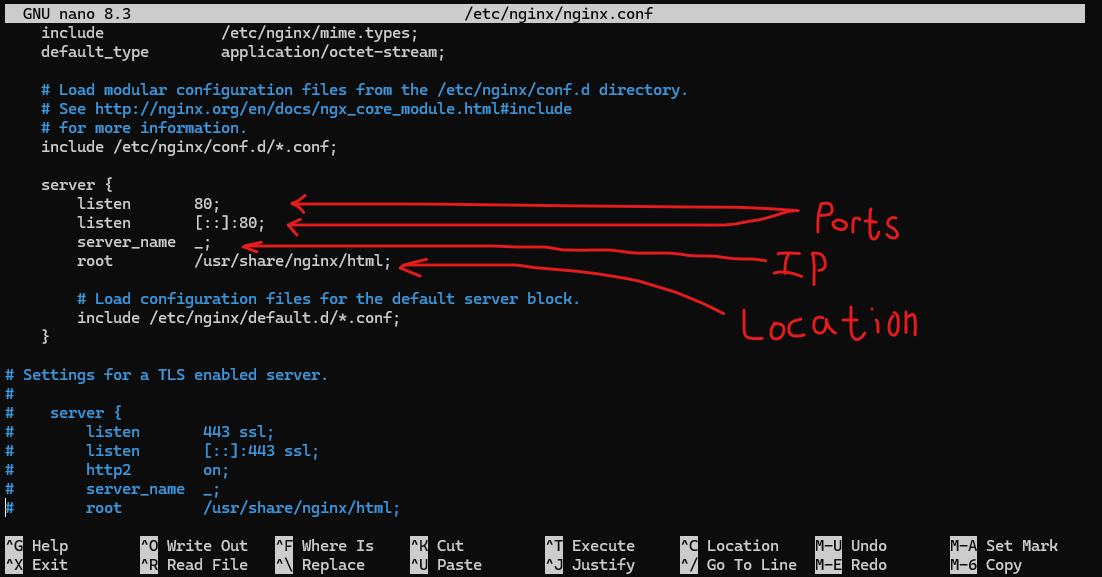
The original configuration includes a line, include /etc/nginx/conf.d/*.conf. This line tells nginx to look here for our custom-configured servers, such as the one about to be configured.
2. Create your own configuration file: Run the command sudo nano /etc/nginx/conf.d/myOnlineServer.conf where myOnlineServer can be any name you choose. Enter the following text:
        server {
            listen 80;
            server_name your.vm.ip.here;
            root /path/to/your/homepage;
            index index.html;
        }
Save and close it (Ctrl/cmd+S, then Ctrl/cmd+X).
3. Every time the configuration changes, nginx must be reloaded. Run the following command:
sudo systemctl reload nginxAlternatively, sudo nginx -s reload achieves the same outcome.
4. Visit the IP address again. If you are running Ubuntu, you should see your homepage:
If you are running Ubuntu, CONGRATULATIONS! Your project is complete, and you can skip to the end of the page.
However, Fedora users will see a 403 Forbidden page. This is due to a normal security feature enabled by default in both Red Hat Enterprise Linux (RHEL) and Fedora, which is what RHEL is built on. The module, known as SELinux, was developed by the NSA and released to the open-source community in 2000. While it is a powerful technology, it's a bit restrictive here.
5. Lessen access permissions on the web server. (This can be changed back later.) Run the following command:
sudo setenforce Permissive6. Reload the configuration. This is only necessary if the configuration (*.conf) file is changed, but doing it here and now forms a habit to think about updating the configuration upon any server change. Run the following command:
sudo nginx -s reload7. Visit the website.

The full, non-interactive bash script is available on Github, both for Fedora 42 and for Ubuntu 24.02.